Friday, December 16, 2011

Walk Cycle 2 : Option 3 (Joe walking up the stairs and jump)


This is my second walk cycle. I chose this one instead of the emotive one because i thought it would be more fun to try out what i have learnt from walk cycle 1:standard walk cycle, this time with a climb on a stairs and then a jump, next landing safely on the ground and then finally standing straight up again to do his celebratory applause for completing the jump safely.

And yes it has been fun. Like standard walk cycle, i have learnt so much from when i first started and i think i did well. My research for this one  is this image here 


I've been told by my lecturer that this is a correct one to follow. I feel that i did a good job, i'm happy with it and i hope you feel the same way:) Here is a video of the back perspective view,


And the side view also.


Standard Walk Cycle


This is my standard walk cycle. I learnt and exercised  from this project, key poses (contact, down, passing, up, contact), hang time, fine-tuning, timing and gravity. Following reliable walk cycle poses like this one here


I like this one because its really clear cut. Especially the part with the height. It helped me a lot to get the basic blocking right so i would recommend this one:)
The challenges i faced were particularly the hands. When i first started out, they were moving back and forth so quickly because i was trying so hard to pose them and keyframe them with the blocking poses by following the walk cycle pictures like the one above and what i realised after that was i should be syncing them with the movements of the leg (right hand out, left leg out) instead of depending on pictures so much.
Then i learnt about creating hang time with one keyframe at the front and back of the main one.

And here is the side view also for better viewing,

and also the front view,


Hope you like my standard walk:)

Thursday, December 1, 2011

Big Dog Animation

For this animation, we had to make use of the pendulum effect too so that it looks smoother when it moves. Paying attention to the weight and anticipation is really important in this exercise because it really shows whether we understand those principles or not because Big Dog is falling and moving, trying to regain its balance. So what i did was make sure the body only rotates when two legs moving in the same direction hit the ground to stabilize itself! That's when the weight will shift! And i moved two legs at one time to synchronize them. Something funny was, my Big Dog somehow turned out to move like a lady. It led me to thinking, is the animator a girl or guy possible to tell from just watching the animation?


Weight Shifting animation

This is my joe rig doing weight shifting. It may look short and simple but weight shifting can not be done without any thinking and calculation. The important thing about this is to be attentive to which leg is shifting so that it looks like the weight is there. And the body cannot be jerky or not smooth. Have to think 'pendulum'.


Character Development

Research and planning

I got inspired when I was searching through pictures of superheros and all of them were young and strong and able-bodied. Like how spiderman’s body transformed after he got bitten by the spider, it shows just how much comic artists liked to make their characters seem perfect. So I wanted my character to have a flaw but live with it and adapts to it to make himself stronger. 


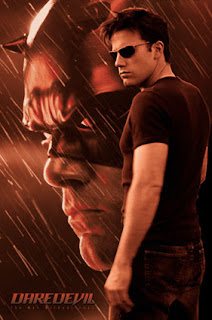
At first I wanted to put the flaw on one of the senses in located at the head. Visually-challenged was a good option because it didn’t affect anything else, like the hearing which is very important to fend off enemies coming from every direction but comic character, Daredevil, has already that flaw and since I already mentioned how important hearing is, I wouldn’t go on to say why I didn’t choose that after.


So I thought about the body parts again and I thought hey the leg would be different. Like how if a pirate in the past loses one of his leg and uses a prosthetic leg, he would walk really clumsy. I wanted my character not to be clumsy but very agile and fast even with a prostatic leg.

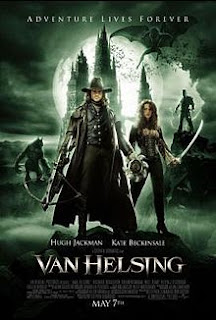
I added in the medieval era and crossbows and I thought it was similar to Van Helsing! However, my story is different from Van Helsing’s. Mine was about a boy learning how to lose his anger and hate and be focused on the sense of justice instead in his journey and van helsing was about a hero doing the right thing all along because he was trying to get rid of evil. 


I wanted my character to be in a fantasy world set in the olden days which makes the environment more interesting. And to make him more memorable, I decided to make my superhero a little more different so I made him young and gave him a prosthetic leg and a signature walking stick. In my research on prosthetic legs, I found this story about a great and kind man who never stopped serving the society in every way he can until he can no longer do so. So I thought I would share it on my blog too
J
http://www.bowen-therapy.com/index.php?inhalt=bowen-therapy.history
Things i thought about when creating my character
1)Emotive nature of the story – Fantasy
2)Environment of the character – he grew up alone with his grandfather and trained hard to make himself strong enough to defeat the faeries
3)Physical capabilities – Strong arm, flexible body, one prosthetic leg
4)Strength – Righteous, brave, determined and smart
5)Weakness – Filled with hate for faeries
6)Emotive capabilities – Always holding on to his walking stick, squinting his  eyes when he is suspicious or coming up with a plan
7)Accessories – Costumes (shirt, lace up vest, waist sash tie, boot and wooden prosthetic leg)
                           - Props (Crossbow and magic walking stick/ telescope)
8)Surface Texture and Color – Fair skin, Gold Blonde hair, Green eyes, white shirt, brown vest and tie, prosthetic leg, black leather boot
Character Overview
1.      Name: Fendrel
Tagline: The Fairy Hunter
Brief Introduction: A young boy was born with legs that made him jump higher and run faster than anyone. His great ability soon travelled to the ears of the queen of evil fairies who felt threatened by his existence. When she came for him, his parents lost both their lives trying to protect him and he managed to survive secretly, though with only one leg left. Now he is back as a brave man with a prosthetic leg and legendary weapon: a magic walking stick that doubles as a telescope (for aim) and a crossbow to take revenge.

2.      This purpose is to tell a story..
In the medieval times, in a world where faeries are evil and feared, they come out to hunt and feed on human souls at night to stay young, Fendrel, a young man with a score to settle with the fairy queen, takes on the mission to kill all evil faeries. But first, he has to find the mysterious, cloaked merchant to exchange his normal walking stick for the magical one that opens the secret portal to the fairy land. The merchant ends up being his good friend and sidekick. And they both go on the journey together.

3.      What is the driving force of your character
Fendrel will forever remember the pain of losing both his parents and hate the faeries thus he is determined to take revenge and kill all faeries no matter how dangerous he knows it is. He will not let anyone or anything get in the way of his mission. However, through an incident, he finds out that his cloaked sidekick is actually a fairy but a good one and he has to find it in his heart to forgive her and accept that not all faeries are bad and not let hate control his life and perspective of everything. This helps in the end when he spares the lives of good fairies.

4.      What traits are unique to your character
Appearance:
1.      He has a wooden prosthesis leg and carries a red walking stick. He may not depend on the stick for balance much but it’s a very useful telescope to help him spot the flying faeries from far away. The wooden leg has springs instilled in them to aid in his movement well.
2.      He carries a crossbow with him and uses it skillfully for far range attacks. So fast and deadly, faeries don’t get the chance near him.
3.      His key features are his big eyes which are so green and his stare is unwavering which shows his hate and how unafraid he is.
Behaviour:
1. No one hates the faeries as much as fendrel does. He clenches his teeth every time he hears the word and hunts them down as soon as he sees one.
2. Fendrel walks with his chest up high and steady. Even though he holds a walking stick.
3 . He hardly smiles because he does not let his guard anytime for anything. Not even humor.

5.      Write a short dialogue sequence between your character and another person.

Fendrel: Two apples.
(Storekeeper glances at him)
Storekeeper: You know what they say about green eyes, it’s the faeries’ eyes.
(Fendrel clenches his fist and glares at him)
Fendrel: Do not even compare me to those filthy creatures.
Storekeeper: It is only a joke! HAHAHA!
(Fendrel remains still, glare not softening at all)
(Storekeeper’s laughter dies down immediately)

My drawings. This is not my forte but i tried this is how my character would somewhat look like.


other poses:


SPIDEY: 2 other poses

This is a continuation from the first spiderman pose. I went to research a little more on spiderman's signature poses and i found some really unique ones. Before i carry on, i want to say how much i like working with this rig because its so fun! Spiderman just looks like he is in the air in MAYA and can work any crazy pose you give him! Here are my two other poses. I hope you like them:)


This is one i really like, spiderman looks so alert and 'springing with action' and i think i did i pretty good job with this one:) I liked that i managed to keep the feeling of spiderman's feelings in that picture but making changes to the angle.


Spiderman over here is swinging himself through the city again and i like how this picture captures his flexibility and strength. As you can see i had some struggle with keeping the shoulders from looking droopy. Here is what i have right now after trying for quite awhile but i'll keep looking into it:)


Rigging: Woman Pose, Weight painting

POSE 1


POSE 2


POSE3


When i was working on these poses, i found parts of the body that needed the weight shifting tool. The back and chest were the troublesome ones. When i bend the back, the whole chest would get sucked inwards and when i moved the arms down from their usual 90 degrees the chest would look deformed and it took awhile to got my model to look human again. There were too many areas i used the weight painting tool at already so i will show you one example here.

Before weight painting - very uncomfortable looking chest and back area.


Weight Painting process and after


TADAA!! Don't you think it looks much better? :)

And here is a picture of my foot controller. It works pretty well:) And i'm glad it did after all that hard work!


Monday, November 21, 2011

Rigging: Woman

Video tutorials from  http://www.swinburne.edu.au/design/tutorials/P-maya/T-Maya-Rigging-Rigging-a-biped-character-for-animation/ID-125/

This is the first full detailed human body rigging i have ever done and WOW! I have got to say i have this new found respect for riggers! It was a lot hard work and patience! What i have experienced here is that rigging steps does not always go the way you would imagine it'll go. Like getting the local rotational axis to all go in the same direction.

This was the part, i felt myself (i know its a little dramatic but its 19 video tutorials) dying a little inside each time it did not work no matter in which direction i orientated the axis to go( believe me i tried every single combination). The right hand was the one giving me so much problems because it did not cooperate and jerked out of the model each time i did anything at all to the joints (even parenting). I can't count how many times i re-arranged it.


Anyway, back to the local rotational axis, you may think like, "hey its okay if it doesn't work. The guy in the tutorial said that it was your choice to do it or not anyway." But NO! I need to point out here how much work you're saving yourself later if you get the axis right at first because when you get to the "set Driven Key Stage" and pair up the "rotate" function from driver to driven, you only have to rotate one direction (X, Y or Z) but if you notice in my screenshot below, my axis are pointed down diagonally and i couldn't just rotate it in one direction because it'll not appear human at all. I had to rotate function in 2 or even 3 directions to get the correct 90 degrees movement. Like this,
    
Also, for the thumb its a bit tricky because it wasn't included in the video tutorial and you have to consider how the thumb should go like instead of up and down, it faces the side. So you can't blindly do the same thing for each finger.

Here's the full body screenshot of my rig,
     

Side view (better spine to head controller view),


the legs (better foot to knees controller view),


the hand (better hand controller view),


At one point before the smooth skin binding we had to do another step first which was to create an IK Spline Handle to give some "stretchiness" to the spine. The interesting part here was the MEL Command. Its my first time knowing what it does. Its basically for codes to create a boolean to return arclength of a curve. The code is : arclen -ch on BindSpineSIKCurve;  (we named our curve BindSpineSIKCurve before that)  and this step is to add stretch to the chain which i have learnt from pages from this book,

Unfortunately, i can't paste the book details here because that would be copyrighting but its a good book to help you understand more about the MEL Command and rigging. So check out this book if you want to learn more.

Extra details
-ch stands for construction history http://autodesk.com/us/maya/2011help/Commands/arclen.html
Next is the linking of  to the multiplydivide node. One silly mistake i made, was spending so much time trying to find the "input1.inputX" because i was trying to link the arclength of the curveinfo to it. And arclength appeared when i right-clicked the curveinfo node but only output appeared for mulitplydivide.  Finally, through experimenting, it actually appears naturally when you hover your link thread from the arc length over it. Its embarrassing really! Hope you guys don't make the same mistake! Here's a webpage for you to better understand the inputs and outputs of the multiplydivide nodefile:///C:/Program%20Files/Autodesk/Maya2011/docs/Maya2011/en_US/Nodes/multiplyDivide.html

Rigging has a lot of steps so start from the first step which is the pelvis  because its the center and make your way up:) Good Luck!

Cow Body

This is a sequel to the cow head modelling i did previously. So the cow has a body right now and here it is.


To me this was more challenging but also fun at the same time because we could only follow the instructions given from slides and not a video tutorial to guide us in every step of the way so it was more freestyle. What i mean by that is i had to follow my own instinct and figure out how i could shape and sculpt the model.

This is a side view of my cow.

I made a mistake on my first attempt because the instructions had a typo error and it said, "subdivision height and width, 3 and subdivision depth 4." So what happened was when i got to the stage where i had to pull the belly out, i did not have enough subdivisions and the best belly i could made out of it was one that sunk really low and it did not suit my cow at all because i was thinking its more of a "baby belly" instead of an "old man belly". That's when i realised, the subdivision depth was supposed to be 5. It made me learn how important the right amount of subdivision is.

This are the legs of my cow and one difficulty i had here was when i extruded the legs at first, i moved the extrude tool all the way down instead of extruding many times to create the subdivision for the legs. The slides just noted, "Remember to leave details on the legs."

So it left me stuck at this point, googling again and again on how to create subdivisions on my extruded smooth surface. And i found this website, http://caad.arch.ethz.ch/info/maya/manual/UserGuide/ModelingPoly/PolySplitSubdiv.fm.html#997663
Its really quite helpful with Maya problems. Very clear instructions. I go back to it with my other problems too.

So it was extra work but i managed to learn how to make use of the "Add Divisions" and insert edge loop tool" (of course, deleting any unnecessary edges to tidy up) right here.

And here's the close up of the hand which needed to me trust my instincts on moving around the vertexes to not make it look so blocky. This is it for my cow, i hope you manage to learn from my mistakes and its helpful to you:)

Saturday, November 12, 2011

Posing: 11SecClub Rig!

Our lecturer had us experimenting with this rig from http://www.11secondclub.com/

One important thing i have figured out and would like to point out is, if you want to use the rig. You have to open the maya file given called, workspace and then drag in, 'ElevenRig_RC1', from the Scenes file. To achieve the correct texture which is supposed to look like this.


If the 'ElevenRig_RC1' file is dragged into a new maya scene created by yourself, it will give you this ghoulish kind of texture.

   
And that IS NOT THE ONLY PROBLEM because if you decide to stick with it and render it after all that hard work, it will only look black like this. You can't even change the environment color. So please make this step before working on your rig.


 So back to the work, we're supposed give them 3 poses and here are the pictures we've gotten from the internet.

I'm calling this one the '300',

This one the 'Tattoo Girl',

And finally, this one, the 'Bollywood Girl'.

And this is what i came up with. For 300, i did this one first and it took quite some time because the arms on the rig felt too long compared to the small body it had so i had to angle it more towards the back. Overall, i like the pained facial and body expressions. Here are renders of it.


This is a Full Body.

This is a close up. 

Now for the Tattoo Girl,  there was also a bit of trouble with the hands but i managed to get her into the pose. The tricky about this one is you have to do the pose yourself to realize that she isn't exactly leaning forward even though her right arm looks as if its supporting her weight. Also, her facial expression looks like she couldn't care less when her body is in such a complicated pose.


This is the full body.

This is a close up.


Finally, the Bollywood Girl. Her pose is also interesting because she's very relaxed but not to the point whereby she slouches all over the chair. She still manages to keep her classy look by keeping her back straight. I made a slightly-curved back chair here for her to make it look more relevant.


Tuesday, November 1, 2011

Posing: Spidey:)


We've moved on to doing posing right now, using an awesome spiderman rig for our first practice. I found out today that there are a lot of things to consider before you do posing. Like the "lines" to make an expression with the body, for example, the C shape for actions like a character being pushed back or inverted C to be menacing or heroic and many more like S or | and etc. Good to remember that it is mainly about the spine.

Other important points to take note of is the weight of the body when the character does a pose so that it doesn't look stiff and a slight twist in the body posture can actually bring more "tension" and live to a character.

So here are shots renders for my spidey. Notice i twisted the spine a little towards his right so he looks like he is resting his weight and the knees are pointed downwards to balance his weight so that it looks more natural. I'm really quite happy with it except for the part where i did not keep his hip control horizontal but rotated which i found out after from my lecturer that i could cause problems if i start animating. All and all, i'm happy with the pose now so i hope you feel the same way about it:)

                                                                        Front view

                                                                         Back view
                                                                         
                                                                          Side View

                                                       Interesting perspective: I kind of
                                                       played around and got this shot which i find
                                                       pretty interesting like it could be used for a
                                                       part of a movie scene.